
In this section, I show the practical skills I used in my project. I walk through the production process, starting with planning and recording, then moving on to editing, technical choices, exporting, and reflecting on the work. I also include screenshots, version comparisons, and explain the decisions I made along the way.
Pre-Production and Planning
Script / Narration Plan
I created three versions of my script to show how the opening of my documentary developed. The main idea stays the same in each one, but each version is more polished and gets closer to my final edit.
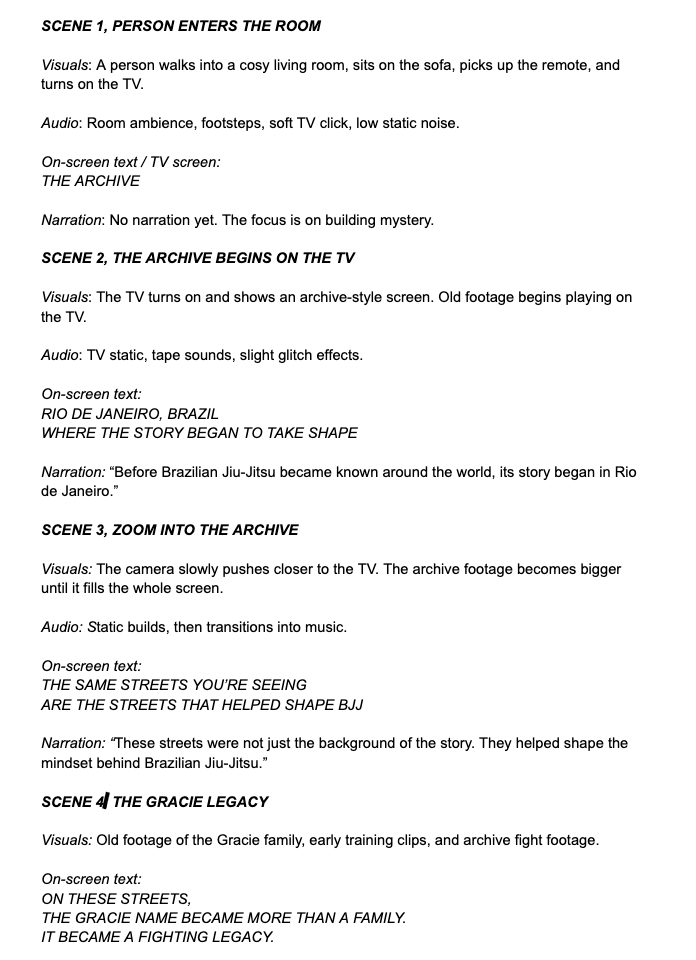
Version 1, TV Room Idea
In my first version, I pictured the documentary starting with someone walking into a room, sitting down, and turning on the TV. The Archive would already be playing on the screen. The camera would then slowly zoom in on the TV until the archive took up the whole frame.
This version was more literal because it showed someone physically discovering the archive.
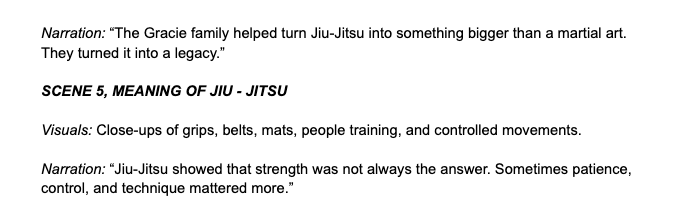
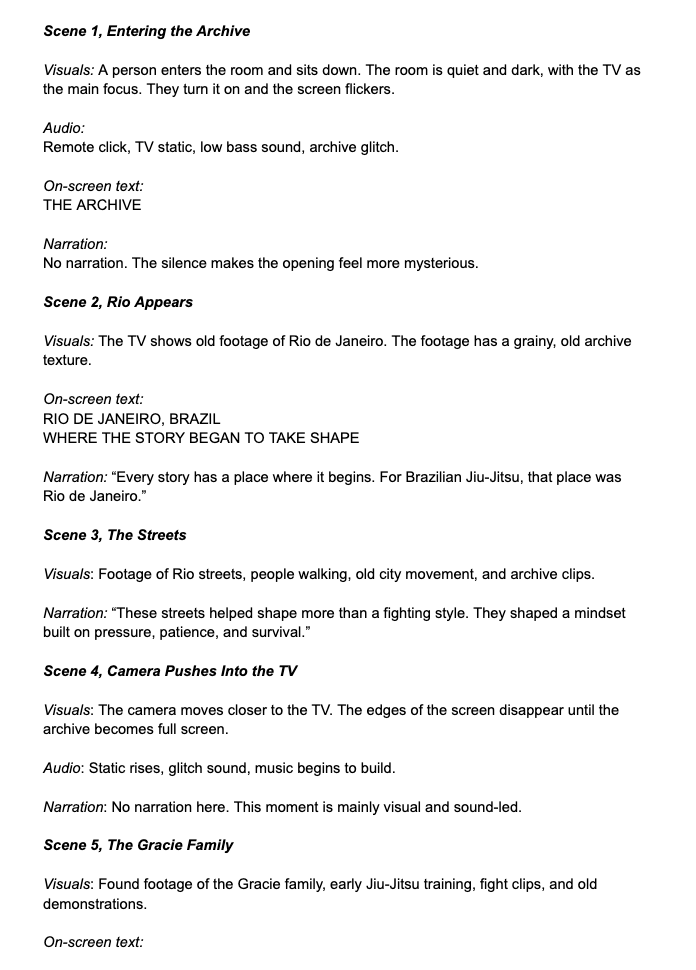
Version 2, Improved TV Concept
For the second version, I kept the same idea of someone turning on the TV, but I made it feel more but aimed to make it more cinematic and less like an ordinary living room scene. Rather than just showing the archive, I wanted the TV to act as a portal to the past. I also changed the wording to make it sound more dramatic and similar to a documentary.
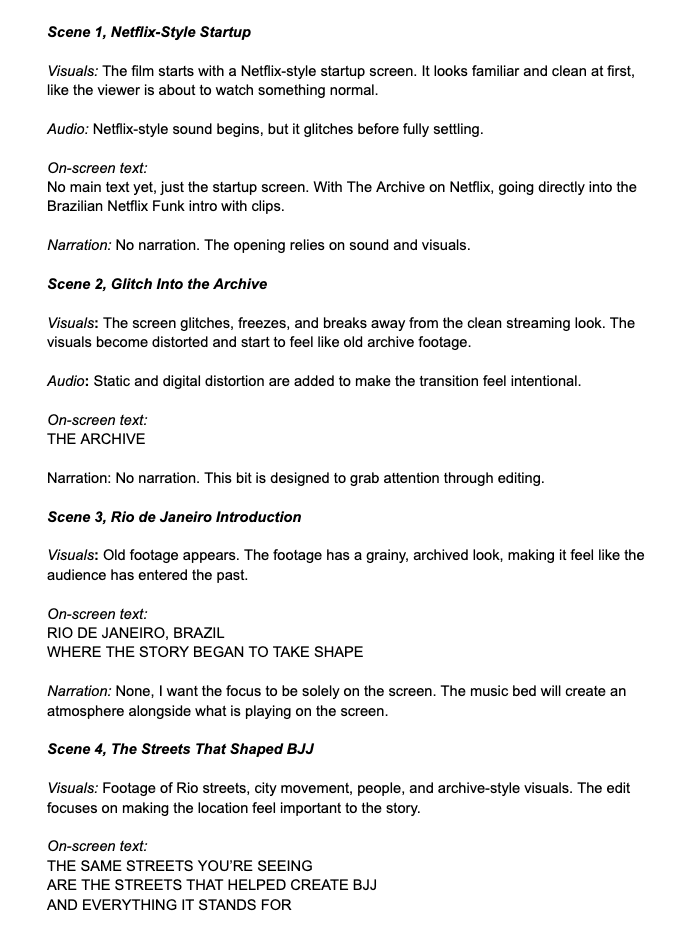
Version 3 , Final Version: Netflix Startup / Glitch / Archive
For my final version, I changed the opening so it matched the actual edit I created. Instead of a person physically turning on a tv, I used a netflix startup screen. The opening begins like someone is opening up netflix, but then it glitches and turns into The Archive. This made the opening feel more modern.
This version is the strongest because it feels more professional and better fits the style of my final film
Why the Final Version Improved
My final version worked better because it felt more connected to my actual edit. The first idea with the person turning on the tv helped me plan the idea of entering an archive, but the Netflix startup made the opening feel more modern and engaging, and also looked smoother. When i attempted to use green screen it looked patchy and nothing like what i expected. The glitch transition also helped link the streaming screen to the archive footage in a more creative way.
By creating three versions, I was able to show how my idea developed from a simple TV scene into a more stylised and professional opening sequence.
Production Schedule
My production schedule helped me organise the different stages of my project. By following a clear timeline, I was able to keep the production process structured and make sure each part of the project was completed in a logical order.
I changed the timeline from the production plan I made in my proposal. The new timeline helped me organise the main stages, starting with research and collecting archive footage, then moving on to editing and exporting the final project. Since my project uses a found-footage documentary style, I spent most of my time finding clips, sorting my archive, planning the edit, building the story, and working on the sound design.
| Week | Planned Tasks | Recording / Editing |
|---|---|---|
| Week 1: Research | I analysed documentary styles, collected inspiration and developed the main concept for my project. I looked at sports documentaries, found footage editing, and BJJ content to understand the style I wanted. | I didnt do any filming or editing. Focused on research, planning and deciding the direction of the project. |
| Week 2: Footage | I found BJJ footage, selected relevant clips and organised my archive into folders. This included main story clips, extra details and wider world/context footage. | I planned and gathered the footage I would use in the edit. I also prepared any footage that needed converting to MP4 so it would work properly in Premiere Pro. |
| Week 3: Editing | I started building the rough timeline, arranged the narrative flow and tested the pacing of the documentary. This helped me see which clips worked together and which sections needed more development. | Main editing sessions began this week. I started cutting together the opening sequence, including the netflix intro idea, and began placing archive footage into the timeline. |
| Week 4: Refinement | I improved transitions, added sound design and made final adjustments to the structure. This included making the project feel more cinematic and less like a basic montage. | I focused on refining the edit, improving the transition moments, adding sound effects, testing music placement and making the pacing feel smoother. |
| Week 5: Final Outcome | I exported the final video, collected feedback, and began reviewing the results. I wanted to see if the documentary clearly showed the history and atmosphere of BJJ. | i had the last editing sessions. I completed the final cut, checked the audio levels, exported the video and reviewed the outcome for any final mistakes. |
| Week 6: Catch-ups | This was used as a final catch up week for any extra work, corrections or edits that needed to be completed before submission. | I used this week to make any last improvements, fix small editing issues and make sure all evidence was ready for my practical skills section. |
Reflection on the Schedule
The schedule helped me stay organised because my project had a lot of different parts, including archive footage, music, sound effects, editing tests and visual effects. My original proposal gave me a clear plan, but I adapted it as the project developed. For example, my opening idea changed from someone turning on a TV to a more stylised Netflix startup/glitch opening, so I adjusted my editing sessions to focus more on that sequence.
This shows that I followed my production plan but also responded creatively when the project developed in a better direction.
Running Order / Cue Sheet
My running order lays out the structure of each section in my documentary, showing where visuals, archive footage, text, music, and sound effects are used. This made it easier to plan the edit and connect the Netflix intro, Rio archive footage, Gracie history, and modern BJJ scenes smoothly.
Since my FMP uses found footage and an archive editing style, I made a cue sheet or running order instead of a regular shot list. This helped me decide what footage, text, music, and sound effects to include in each part of the edit.
| Time | Video / Visuals | Text / Graphics | Audio / Music / SFX |
|---|---|---|---|
| 0:00–0:10 | Netflix style opening screen then profile selection then screen recording intro | No text yet, just the screen opening | Netflix style startup sound, subtle screen hum, button click sound |
| 0:10–0:20 | Screen begins to glitch and lag, making tension before the archive begins | Possible small glitch text or loading style screen | Funk da Netflix audio begins, glitch sounds, |
| 0:20–0:30 | Transition into old archive footage look, with VHS effect | “THE ARCHIVE” title appears | VHS static, glitch transition, |
| 0:30–0:50 | Rio de Janeiro street footage and old Brazil visuals | “RIO DE JANEIRO, BRAZIL WHERE THE STORY BEGAN TO TAKE SHAPE” | Funk beat continues quietly, old film crackle |
| 0:50–1:10 | Streets, people, movement, old Brazilian visuals | Nothing | old tape noise |
| 1:10–1:35 | Gracie family archive clips and early Jiu Jitsu footage | “ON THESE STREETS, THE GRACIE NAME BECAME MORE THAN A FAMILY. IT BECAME A FIGHTING LEGACY.” | Archive audio texture and muffled crowd noise |
| 1:35–1:55 | Close ups of grappling, training, grips, body movement and old fight footage | No text | Breathing and mat impact sounds |
| 1:55–2:20 | Cut into more modern BJJ footage and students training | No text | Gym ambience, and gi grip sounds |
| 2:20–2:45 | Faster montage of training, rolling, technique, movement and close ups | No text | Beat becomes stronger and crowd reactions |
| 2:45–3:10 | section showing the human side of BJJ people w/ focus, discipline, tiredness, respect | No text. | Music drops slightly |
| 3:10–3:30 | Final montage combining Rio Gracie footage and modern BJJ | “THE ARCHIVE” | tape rewind, glitch out |
| 3:30–End | Fade to black | No text | Nothing |
Music Used
| Music / Track | Where I Used It | Why I Used It |
|---|---|---|
| Funk da Netflix audio | Main intro transition from the Netflix-style opening into the BJJ archive | I used this because it starts with a recognisable Netflix-style sound but then glitches into funk, which fits the Brazilian/Rio energy of the documentary. It helped make the opening feel modern, unexpected and attention-grabbing. |
| Mas Que Nada | Under the archive sections and clips showing Brazil | I used this to make the footage feel more authentic and , especially when showing Rio. |
Movimento da sanfoninha | During the faster montage sections | This helped connect the edit to Brazil and gave the visuals more movement and energy. |
Sound Effects Used
| SFX | Where I Used It | Why |
|---|---|---|
| TV remote click | At the start when the Netflix style intro begins | To make the opening feel like someone is starting the archive on a screen. |
| Digital glitch sounds | When the Netflix style intro starts lagging and changing into the archive | To create the transition from modern screen recording into old archive footage. |
| VHS static | Over archive footage and title cards | To create an old footage, found footage documentary style. |
| Tape rewind sound | Near transitions and the ending | To add to the archive theme and show movement through history. |
| Whoosh transitions | Between text cards and footage changes | To help the edit flow smoothly without feeling too empty. |
| Mat slap sounds | During BJJ training and grappling footage | To make the physical side of Jiu Jitsu feel more real and intense. |
| Breathing sounds | During close up training moments | To show pressure and human side of training. |
| Static fade out | At the end of the film | To close the documentary in the same archive style it began with. |
Why I Structured It This Way
I set up the cue sheet so the documentary opens with a modern, familiar intro, then gradually shifts into an archive of the BJJ story. The first part introduces Rio and how BJJ began, the middle highlights the Gracie legacy and what Jiu Jitsu means, and the last part links the history to current training footage.
The audio just as important as video because I wanted the film to feel like an archive being discovered, not just a normal sports montage. The glitch sounds, VHS static and funk music helped create a mix of old history and modern Brazilian energy.
Evidence
Still Image editing Versions
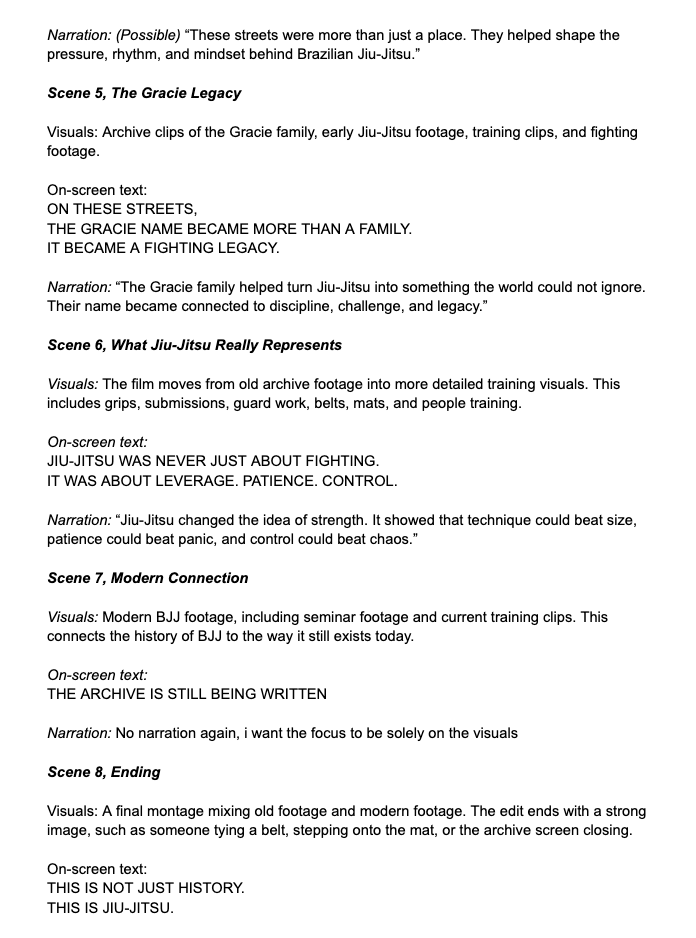
To create my Netflix style banner for The Archive, I made the design in Photoshop with a combination of image editing, compositing and layout skills.
I began by picking a strong BJJ action photo to make sure the banner immediately showed the sport’s intensity and documentary feel. I used tools like Select Subject and Remove Background to cut out the main grappling image, which let me place the fighters into a more cinematic composition.
Next, I added a dark background and used fading and gradient effects on the left to leave room for the title and information, similar to Netflix banners. On the right, I included smaller supporting images, like close-up details and competition shots, to give the banner a documentary archive feel.
Finally, I added Netflix elements like the title, description, buttons, date, genre, and navigation bar to make the design look like a real streaming platform banner. This project helped me practice layering, cutting out images, color matching, and layout design.
This is was the process:


Found Footage Source Log
This log lists all the found footage material I used in my film, such as archive footage, music, sound effects, overlays, and other media I did not make myself. I included this to show that I sourced everything responsibly and chose each piece to support the meaning, mood, and structure of my documentary.
I mostly used found footage to create a historical archive section that shows Rio de Janeiro, the Gracie family, early Jiu-Jitsu culture, and how it grew into modern BJJ.
Found Footage / Archive Source Log Table
| Asset Title | Source URL | How I Used It | Where It Appears in the Film | Creative Reason for Using It | Edits / Changes Made |
| Old Rio de Janeiro street footage | https://www.youtube.com/watch?v=bVvlfInoVvY | Used as part of the opening archive montage. | after the Netflix intro, when the film introduces Rio as the place where the story begins. | I used this footage to establish the historical setting and make the audience feel like they are entering the past. | Cropped to fit the frame, colour adjusted, film grain added, |
| Rio de Janeiro city / street life footage | https://www.youtube.com/watch?v=iNfEAJVVY10 | Used to build the atmosphere of Brazil before introducing BJJ. | before the Gracie family footage. | connect the documentary to the streets and culture of Rio, showing that BJJ came from a real social and cultural environment. | Cut into short clips, slowed slightly, colour graded, and layered with vintage texture. |
| Gracie family historical footage | https://www.youtube.com/watch?v=7E41qCP7Z-Y | introduce the Gracie family and their role in BJJ history. | Appears in the middle of the archive section, after the Rio establishing shots. | important because the Gracie family are directly connected to the spread of BJJ. | Trimmed into short sections, matched with narration and blended with old film effects. |
| Early Jiu-Jitsu / martial arts training footage | https://www.youtube.com/watch?v=7E41qCP7Z-Y | Used to visually explain the technical side of Jiu-Jitsu. | when the film explains that BJJ is about leverage, patience, and control. | visually supports the message that BJJ is not only about strength or fighting, but about technique and strategy. | Added grain, adjusted contrast, and synced cuts to the rhythm of the music. |
| VHS / static glitch overlay | https://www.youtube.com/watch?v=shpEVgl8ZkI&list=PLqMT2Ige6woYg9u5vxjLKiRJ6i6bmceoz | Used as a visual transition effect. | during the transition from archive footage into modern BJJ. | transition feel like the archive footage was breaking or shifting into the present day. | Blended over footage, shortened, opacity adjusted, and synced with sound effects. |
| Film grain /dust texture overlay | https://www.youtube.com/watch?v=hvhls0jLkI8 | Applied over archive clips. | Appears throughout the historical archive section. | helped create a consistent old footage style and made clips from different sources feel like they belonged in the same sequence. | blending mode changed, and applied across multiple clips. |
| Brazilian funk track | https://www.youtube.com/watch?v=gN5JccHongU | Used to bring Brazilian energy and rhythm into the edit. | Appears during the Brazil n archive n transition section. | I chose this because Brazilian funk connects directly to Rio culture and gives the film a more energetic, modern Brazilian identity. | Cut to fit the sequence, faded in N out, and balanced underneath sound effects. |
| Netflix-style startup visual reference | https://www.youtube.com/watch?v=hdlf9xOBTno | Used as inspiration for the opening title sequence. | Appears at the very beginning of the film. | I used this style to make the documentary feel like the audience is opening an archive or selecting a film to watch. | Recreated using my own title, timing, graphics, and glitch effects. |
| KSC Academy seminar footage | Original footage | Used to show modern BJJ in a real academy environment. | Appears after the archive section when the film moves into present-day Jiu-Jitsu. | footage connects the history of BJJ to my own environment and shows that the legacy continues today. | Edited for pacing, colour corrected, n synced with music. |
| Modern BJJ sparring / training footage | Original footage | Used as the main modern BJJ section. | Appears in the final part of the film after the archive footage. | I used this to contrast old archive footage with modern training and show how BJJ has developed over time. | Cut into a fast paced montage, colour graded, and matched to sound design. |
| Close-up shots of gripping, passing, or grappling | Original footage | Used to make the final section feel more intense and detailed. | Appears during the modern BJJ sequence. | These close ups helped show the physical details of Jiu Jitsu, such as control, pressure, grips, and movement | Cropped, slowed in places, and synced to key beats. |
| Archive-style title cards | Original design | Used between archive clips to explain key parts of the story. | Appears throughout the Rio and Gracie history section. | These title cards helped guide the audience without relying too heavily on voiceover. | Animated with fade-ins, slight movement, and vintage styling. |
I didn’t pick clips just because they seemed old or caught my eye. Each one was chosen to help tell the story of BJJ, starting with the streets and culture of Rio de Janeiro, moving to the Gracie family, and then linking that history to today’s training at different academies. The archive footage helped set the time, place, and legacy, while my own recordings showed how BJJ is practiced now in a real academy.
I made editing choices to help the found footage feel consistent. Since the clips came from different places, they varied in quality, color, frame rate, and style. To bring them together as one film, I used color correction, cropping, film grain, VHS-style textures, static effects, sound design, and pacing changes. This made the archive section feel purposeful instead of just a mix of random clips.
Some of the footage was my own, like the KSC Academy seminar and modern BJJ clips. Other parts were found footage used for the assessment. Making this log showed I understand the difference between original content, licensed media, copyrighted material, and visual references.
Premiere Pro Timeline Development
Here is my Adobe Premiere Pro timeline at different stages of the editing process. This shows how my project developed from raw imported footage into a structured rough cut, and then into a final edited documentary sequence with archive footage, music, sound effects, transitions, text, and colour grading.
-Raw Import Stage
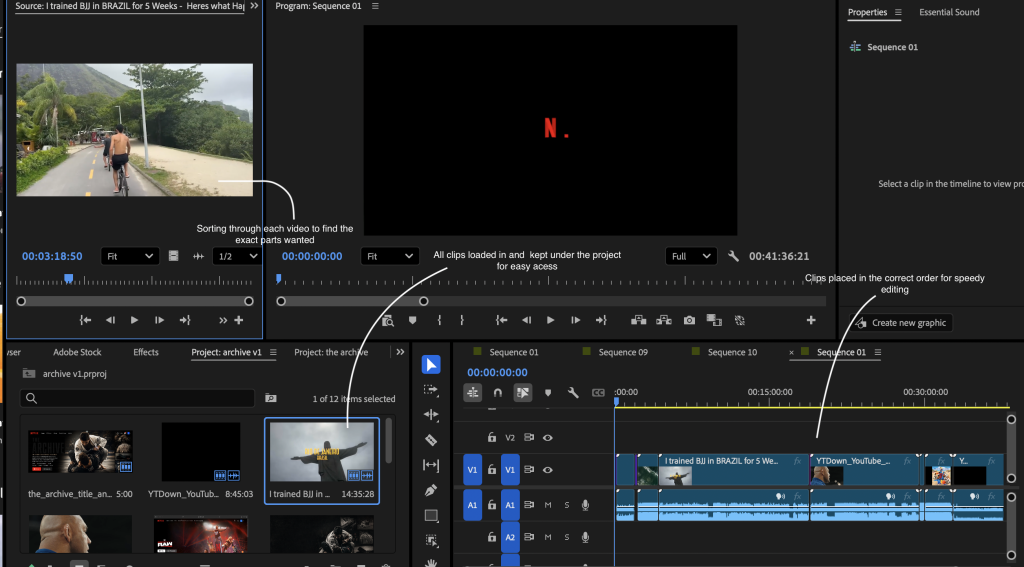
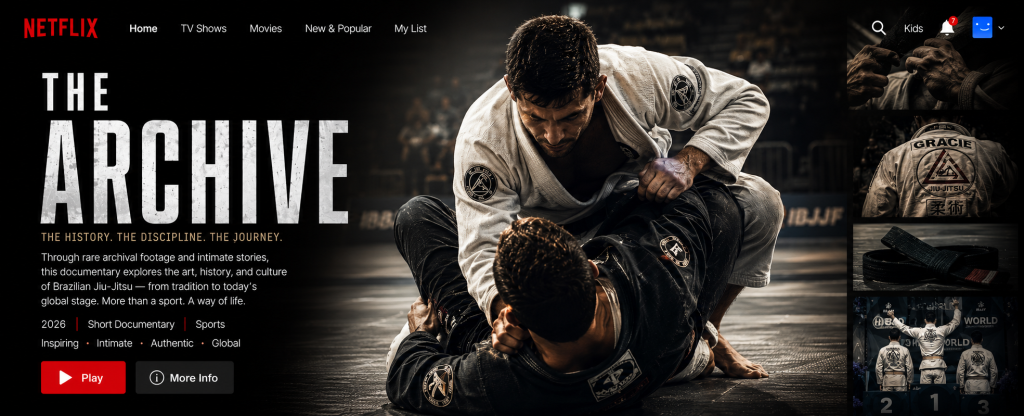
This screenshot shows the beginning of my editing process, where I had imported my footage and assets into Adobe Premiere Pro. AThe main purpose was to organise all my material before building the actual film.
For my project, I worked with a mix of media, like archive footage, old Rio clips, BJJ footage, seminar videos from different academies, sound effects, music, text and title graphics, and visual overlays such as grain or glitch effects. This step mattered because my documentary is made from found footage, so I had to keep track of many sources and stay organized.
What I did at this stage
At the raw import stage, I focused on:
| Area | What I Did | Why It Was Important |
| Importing footage | I brought all my raw clips, archive clips, music, and sound effects into Premiere Pro. | This gave me all the material I needed before starting the edit. |
| Organising assets | I separated my footage into different sections, such as archive footage, modern BJJ footage, audio, overlays, and title cards. | This made the edit easier to manage and helped me work more professionally. |
| Reviewing clips | I watched through the footage to decide what clips were usable and what clips were too weak, slow, or irrelevant. | This helped me avoid wasting time editing clips that did not support the story. |
| Planning the structure | I started thinking about the order of the film: intro, archive section, Rio history, Gracie/BJJ section, and modern BJJ. | This helped me build a clear documentary flow instead of placing random clips together. |
Since my project uses archive footage, I needed to consider how each source would fit into the documentary. Some clips worked well to show Rio de Janeiro as the starting point, while others were better for showing the growth of Brazilian Jiu-Jitsu or the current academy setting.
This step helped me make practical choices before editing. I began sorting the clips by their purpose instead of just by file name. For example, some footage set the atmosphere, some showed history, and some added action and energy. This approach made my editing more focused and helped me avoid making a random-feeling montage.
-Basic Timeline
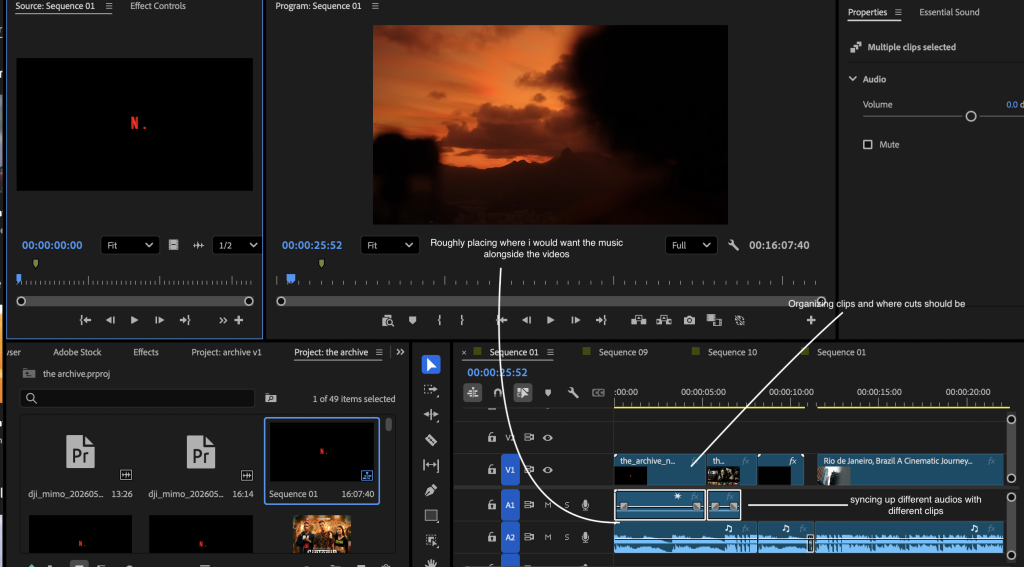
This screenshot shows the first version of my timeline, where I began putting clips into a rough sequence. At this point, the film had a basic structure, but it still needed a lot of work. I arranged the clips in the order I wanted the audience to follow the story, but the pacing, transitions, sound, and effects were not finished yet.
At this stage, I focused on building the basic narrative order:
| Section | What I Placed on the Timeline | Purpose |
| Opening | Netflixintro | To make the documentary feel dramatic and cinematic from the start. |
| Archive beginning | Old Rio footage and title cards | To introduce Rio de Janeiro as the place where the BJJ story began. |
| Historical section | Gracie early Jiu-Jitsu footage | To connect the documentary to the origins and development of Brazilian Jiu-Jitsu. |
| Concept section | Clips showing technique, control, and movement | To show that Jiu-Jitsu is about leverage, patience, and control. |
| Modern section | KSC Academy seminar and training footage | To show how the legacy of BJJ continues today. |
This stage mattered because it let me check if the documentary flowed well as a sequence. I focused not just on which clips looked good, but also on how the audience would follow the story. My plan was to start with a strong archive-style opening, move into Rio and the roots of BJJ, and then shift into modern training.
The rough timeline showed me where the story had gaps. For example, I saw that moving too quickly from old footage to modern BJJ felt too abrupt. The audience needed time to understand the history first. That’s why I used archive footage, text screens, and careful pacing to build the idea of legacy before showing the present-day academy.
-Rough Cut Stage
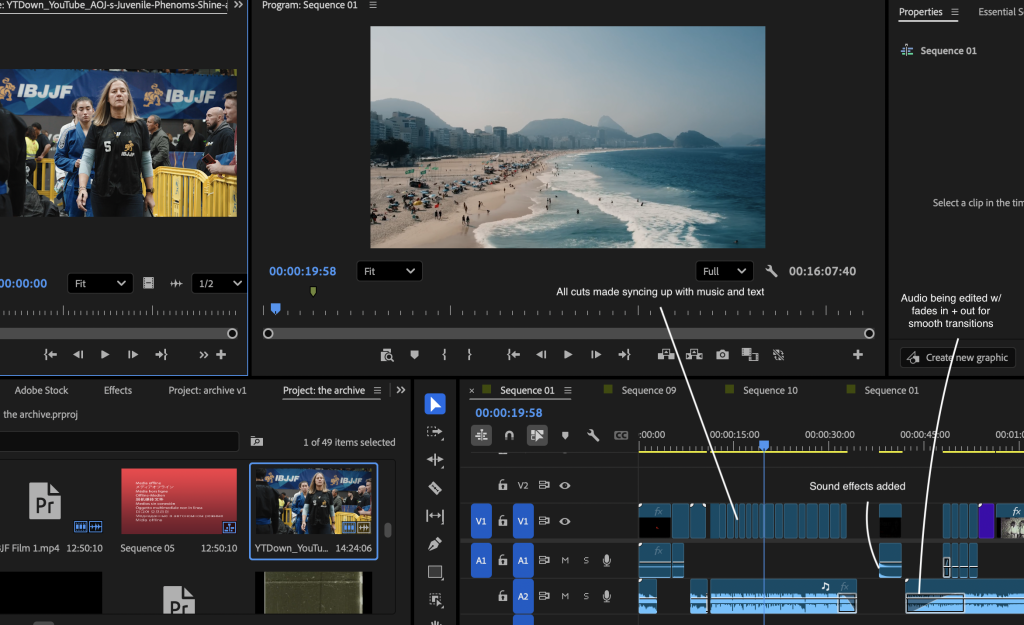
This screenshot shows the rough cut stage of my documentary. At this point, the film had a much clearer structure. The main clips were in the correct order, the archive section was more developed, and I had started adding music, text, sound effects, and basic transitions.
The rough cut was not the final version, but it was the first version where the documentary started to feel like a complete film rather than just a collection of clips.
What I improved in the rough cut
At this stage, I began improving the film in several ways for example,
- Structure
I made the sequence clearer by organising it into sections. Instead of just placing archive clips randomly, I built a journey for the viewer
Netflix-style intro – archive opening – Rio streets – Gracie/BJJ history – meaning of JiuJitsu – transition – modern BJJ
This made the documentary easier to follow and gave it a stronger sense of progression.
- Pacing
I started cutting the clips more carefully so the edit did not feel too slow. Some archive clips looked good but stayed on screen for too long, so I shortened them. I also made sure the modern BJJ section had more energy compared to the archive section.
- Text and meaning
I added text screens to help explain the story without relying too much on voiceover. The text helped the audience understand what they were watching and gave the archive section a more dramatic tone.
Example style:
“RIO DE JANEIRO, BRAZIL
WHERE THE STORY BEGAN TO TAKE SHAPE.”
The text was important because it gave meaning to the footage and helped connect the visuals to the documentary topic.
- Sound and atmosphere
I began adding sound effects to make the edit feel more immersive. For instance, I used static and glitch sounds in the archive section to give it the feel of old footage. I also tried out stronger impact sounds for the transition into modern BJJ.
The rough cut stage made the biggest difference in the storytelling. At first, the timeline was just a group of clips, but by the rough cut, I was shaping the film into a clear documentary. I thought about how I wanted the audience to feel at each moment. The archive section was slower and more atmospheric, while the modern BJJ part needed to feel stronger and more energetic.
During the rough cut, I noticed that the switch from old footage to modern BJJ felt too sudden. To fix this, I tried out different sound effects, visual effects, and pacing to make the transition more dramatic and meaningful. My goal was for the audience to feel like they were moving from the past into the present, not just jumping between random clips.
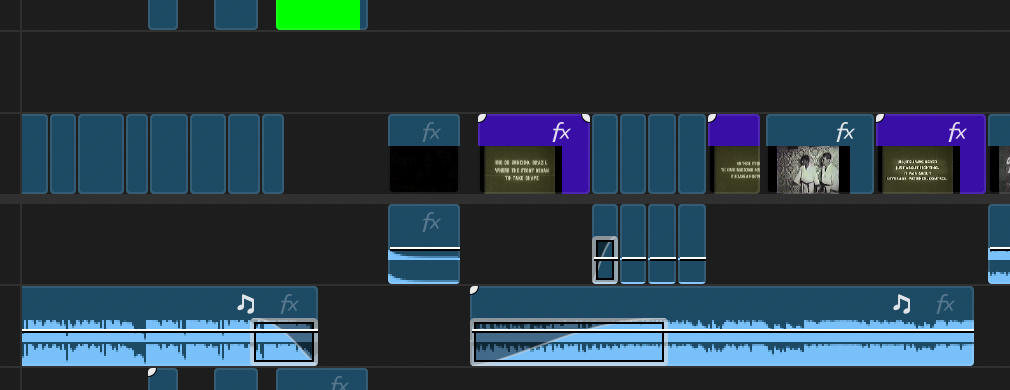
-Effects and Sound Design Stage
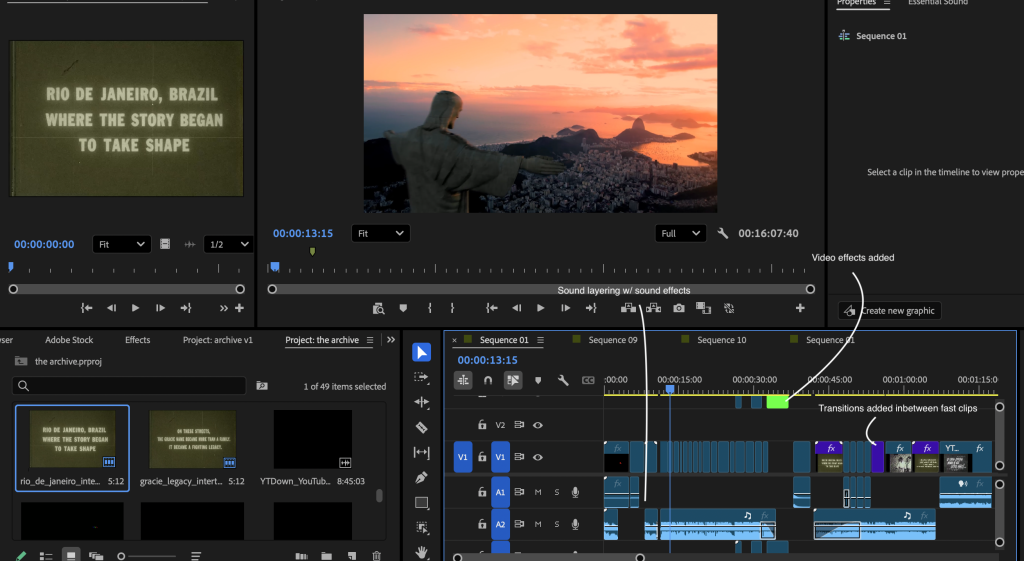
This screenshot shows the stage where I started refining the edit technically. At this point, I had already built the main sequence, so I focused on making the film feel more professional through sound design, visual effects, overlays, colour correction, and smoother transitions.
What I did technically
At this stage, I focused on practical editing techniques such as:
| Technique | How I Used It | Why It Improved the Film |
| Colour correction | I adjusted the brightness, contrast, and tone of clips. | This helped footage from different sources feel like part of the same film. |
| Film grain | I added grain to the archive footage. | This made the old footage feel more authentic and helped support the archive style. |
| VHS/static effects | I used glitch or static effects during transition moments. | This helped create the feeling of old footage breaking into the present. |
| Sound layering | I layered music, static, bass hits, and mat slap sounds. | This made the transition more dramatic and gave the edit more impact. |
| Audio mixing | I adjusted volume levels so the music and effects did not overpower each other. | This made the sound more balanced and professional. |
| Clip trimming | I made small cuts to improve timing. | This helped the edit feel sharper and less dragged out. |
| Text timing | I adjusted how long each title card stayed on screen. | This made the text readable without slowing the film too much. |
At this point, I stopped just arranging footage and started shaping the mood of the documentary. Since my project used clips from many sources, they didn’t match well. Some looked old, others looked modern, and the colours and quality varied a lot. To fix this, I added effects like grain, colour correction, and overlays so the archive section would feel more consistent.
Sound design became important here too. I wanted the shift to modern BJJ to feel smooth, not random, so I used sound to guide viewers. Static and glitch sounds made it seem like the archive footage was breaking or changing, and a bass hit or mat slap marked a clear moment before the modern footage started. This made the edit feel more dramatic and purposeful.
–Final Edit Stage
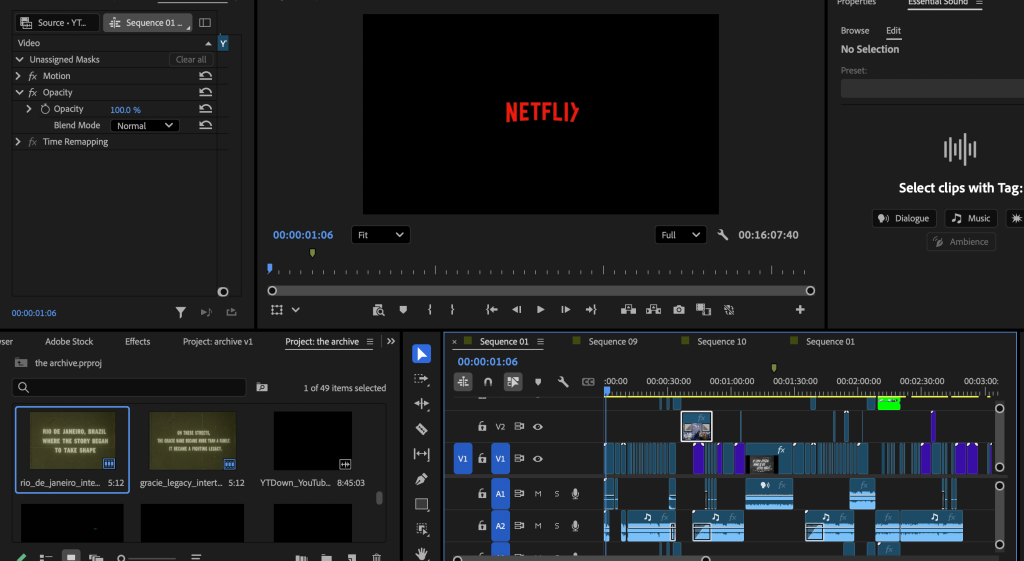
This screenshot shows my final edit timeline. By this point, the documentary sequence was finished. I had arranged the clips in their final order, adjusted the pacing, balanced the sound effects and music, and added visual effects to give it a consistent archive-style look.
The final timeline is more developed, with several layers of video and audio. This shows that the film was made with more than just basic cuts. I used layered footage, title cards, music, sound effects, transitions, overlays, and colour adjustments.
What I improved in the final edit
- Stronger opening
The beginning became more cinematic and eye-catching. The Netflix/archive-style intro helped make the film feel like the audience was entering an archive or opening a documentary.
- Clearer archive section
The Rio and Gracie sections became more connected. Instead of just showing old footage, I used title cards and pacing to explain why the footage mattered.
- Better transition into modern BJJ
The transition from archive footage into modern BJJ was improved so it felt more dramatic. I used sound effects, timing, and visual changes to make the cut feel like a shift from history into the present.
- More professional sound design
I balanced the music and sound effects so they worked together. I made sure the impact sounds were strong but not too messy or overpowering.
- Consistent visual style
I used grain, colour changes, and overlays to make the archive footage feel connected, even though the clips came from different sources.
- Cleaner final pacing
I removed anything that slowed the film down or felt unnecessary. The final edit became more focused and had a clearer rhythm.
Change Between Each Stage
| Editing Stage | What the Timeline Looked Like | What Changed | Why This Improved the Film |
| Raw Import | Clips, archive footage, sound effects, music, and overlays were imported but not fully edited. | I organised the material and reviewed what footage was useful. | This helped me understand what I had and plan the structure before editing. |
| First Assembly | Clips were placed in a basic order on the timeline. | I started building the documentary sequence from intro to archive footage to modern BJJ. | This gave the film a basic story structure. |
| Rough Cut | The film had a clearer order, with music, title cards, and some sound effects added. | I shortened clips, removed weaker footage, and tested transitions. | This made the film flow better and helped the story become clearer. |
| Fine Cut | The timeline became more layered with effects, overlays, sound design, and adjustments. | I added grain, colour correction, static, bass hits, and refined text timing. | This made the film feel more cinematic and professional. |
| Final Edit | The timeline was complete with finished visuals, audio, transitions, and pacing. | I balanced the sound, and made the archive tomodern transition stronger. | This created a finished documentary sequence with a clear style and stronger impact. |
Final Reflection Paragraph
Documenting my Premiere Pro timeline at different stages helped me show how my editing skills developed over time. It makes it clear that I didn’t make the final film all at once. Instead, I improved it by testing, reviewing, cutting, refining, and polishing. Each stage had its own goal: organising clips in the raw import stage, building structure and story in the rough cut, and focusing on pacing, atmosphere, sound design, and a professional finish in the final edit.
Going through this process made me realise that editing is more than just joining clips. It’s about making choices that shape how the audience feels and understands the story. In my film, I used editing to guide viewers from the past to the present, moving from archive footage of Rio and early BJJ to modern training at KSC Academy. By including timeline screenshots and explaining what changed at each stage, I can clearly show how my technical skills and creative decisions improved throughout the editing process.
Colour Grading and Visual Consistency
Here are some screenshots of the colour grading panels I used in Adobe Premiere Pro, and Lightroom. The purpose of the colour grade was to make footage from different sources feel like it belonged in the same film, even though some clips were archive footage, some were modern BJJ footage, and some came from different cameras or apps.
-Lightroom Colour Panel

This screenshot shows the main colour grading adjustments I made in Lightroom. Lightroom was the main software I used for colour grading because it gave me more control over the look of the image, especially when adjusting contrast, shadows, highlights, colour temperature, saturation, and tone.
Most of my footage came from different sources, so the colours did not naturally match. Some clips looked warmer, some looked cooler, some archive clips looked faded, and some modern BJJ clips looked too clean compared to the old footage. I used Lightroom to create a more consistent visual style across the documentary.
Settings I adjusted in Lightroom
| Setting | What I Adjusted | Why I Made This Adjustment |
| Exposure | I adjusted the overall brightness so clips were not too dark or too bright. | This helped balance footage from different sources and made the edit feel more visually consistent. |
| Contrast | I increased contrast slightly to make the image look stronger and more cinematic. | This helped the footage feel less flat and gave the documentary a more dramatic tone. |
| Highlights | I reduced highlights where the image looked too bright. | This stopped brighter parts of the footage from looking washed out. |
| Shadows | I lifted or controlled the shadows depending on the clip. | This helped keep detail in darker areas, especially in gym footage and archive clips. |
| Blacks | I made the blacks slightly deeper. | This gave the footage more depth and helped create a stronger cinematic look. |
| Whites | I adjusted whites to stop the image from looking overexposed. | This helped balance older and newer footage. |
| Temperature | I made small warm/cool adjustments. | This helped different clips match each other better, especially when moving between archive and modern footage. |
| Tint | I corrected green or magenta colour shifts. | This helped remove unwanted colour casts from footage recorded in different lighting conditions. |
| Vibrance | I adjusted vibrance carefully instead of oversaturating everything. | This helped colours feel alive without making the film look unrealistic. |
| Saturation | I reduced saturation slightly on some clips. | This helped create a more serious documentary tone and made the archive footage feel more authentic. |
| Texture / Clarity | I increased these slightly on some clips. | This helped bring out detail in faces, mats, clothing, and archive textures. |
| Colour Grading Wheels | I adjusted shadows, midtones, and highlights. | This helped create a more unified tone across clips from different sources. |
I used Lightroom as my main colour grading tool because my footage came from a mixture of sources and did not naturally match. Some of the archive footage had a faded, low-quality look, while the modern BJJ footage looked sharper and cleaner. Without colour grading, the film would have felt visually disconnected, almost like separate clips placed next to each other rather than one complete documentary.
My aim was not to make every clip look identical, because the archive footage and modern footage needed to feel different. Instead, I wanted them to feel like they belonged to the same visual world. I used contrast, shadows, highlights, and saturation to make the footage feel more cinematic and controlled. I also made small temperature and tint adjustments to correct colour differences caused by different cameras, lighting, and sources.
For the archive section, I leaned into a slightly faded, textured, and older look. For the modern BJJ section, I kept the footage cleaner and sharper, but still adjusted the colour so it did not feel too bright or random compared to the archive footage. This helped create a clear visual journey from the past into the present.


This screenshot shows the difference between the original image and the colour graded version. The before version looked more flat and inconsistent, while the after version had stronger contrast, better colour balance, and a more polished documentary style.
What changed after colour grading
| Before Colour Grade | After Colour Grade |
| Some clips looked flat and unedited. | The image looked more cinematic and intentional. |
| Different clips had different colour temperatures. | The footage felt more visually unified. |
| Some highlights were too bright. | Highlights were controlled and less distracting. |
| Shadows lacked depth or detail. | Shadows looked more balanced and dramatic. |
| Colours looked inconsistent between archive and modern footage. | The whole film had a more consistent visual identity. |
The before and after comparison shows how colour grading improved the visual quality of my project. The original footage did not always match because it came from different sources and was recorded in different conditions. By adjusting exposure, contrast, highlights, shadows, temperature, and saturation, I was able to create a more controlled look. This made the film feel more professional and helped the archive footage, modern footage, and original BJJ footage sit together more naturally in the same edit.
This was especially important in my project because the film moves between different visual styles:
| Section | Colour Grade Intention |
| Netflix/archive intro | Dramatic, dark, polished, cinematic |
| Old Rio footage | Warm, faded, textured, historical |
| Gracie/BJJ archive footage | Aged, slightly desaturated, documentary-style |
| Transition section | More dramatic, darker, glitch/archive effect |
| Modern BJJ footage | Cleaner, sharper, stronger contrast |
| Academy seminar footage | Natural but polished, realistic training atmosphere |
The main reason I colour graded my footage was to join clips from different sources. My documentary includes archive footage, found footage, original BJJ footage, seminar footage, title cards, overlays, and modern training clips. Because these clips came from different places, they had different colours, lighting, quality, and sharpness. Without colour grading, the film would have looked inconsistent and less professional.
I used Lightroom for most of the colour grading because it gave me the most control over the image. I adjusted exposure, contrast, highlights, shadows, whites, blacks, saturation, temperature, tint, and colour grading wheels to create a more consistent visual style.
My colour grade was designed to support the story. The archive footage needed to feel older, warmer, slightly faded, and textured, while the modern BJJ footage needed to feel cleaner, sharper, and more intense. This helped show the difference between the past and the present while still making the film feel visually connected.
Final Reflection Paragraph
Overall, the colour grading process helped improve the quality and consistency of my documentary. Because I used footage from different sources, the clips originally looked visually different from each other. Some were brighter, some were darker, some were more saturated, and some had a completely different colour temperature.
Audio Mix and Sound Balance
Here are the audio tracks and audio levels in Adobe Premiere Pro to show how I balanced the sound in my documentary. Even though my project is mainly visual and archive-based, audio was still important because the music, sound effects, and original clip audio helped control the mood, pacing, and impact of the edit.
The aim of my audio mix was to make sure the music created atmosphere without overpowering the film, while the sound effects were clear enough to emphasise important moments such as glitches, transitions, impacts, and the move from archive footage into modern BJJ.
This screenshot shows the audio tracks in my Premiere Pro timeline. I separated the audio into different layers, including music, sound effects, and original footage audio. This helped me control each part of the sound separately and made it easier to balance the mix during the edit.
I used the audio meters to check that the sound was not too loud or clipping. I tried to keep the levels controlled so the music and sound effects sounded strong without becoming distorted or uncomfortable to listen to
I also adjusted the volume of the audio clips. I used volume changes to make the music fade in and out smoothly and to make sure sound effects did not overpower the rest of the edit. These adjustments helped the sound feel more controlled and professional
The audio mix was important because my documentary relies on mood and atmosphere. Since the film uses archive footage, old Rio visuals, BJJ clips, title cards, and modern training footage, the sound needed to help connect all these parts together. Without audio balancing, the film could have felt messy, with music, effects, and original clip audio competing against each other.
I used the music as the base of the sound design because it controlled the rhythm of the edit. I then layered sound effects on top to emphasise specific visual moments, such as glitches, cuts, and transitions. This made the film feel more cinematic because the sound was connected to what was happening on screen.
The most important audio decision was making sure the transition from archive footage into modern BJJ had impact. I balanced the sound so the archive section felt atmospheric and slightly old, then used stronger sound effects to make the shift into the present feel powerful. This helped the audience understand that the film was moving from history into modern day BJJ.
Overall, the audio mix helped improve the quality of my documentary because it made the edit feel more controlled and intentional. I balanced the music, sound effects, and original footage audio so that each part had a clear purpose. The music created atmosphere, the sound effects added impact, and the original audio helped keep parts of the film feeling real.